In this guide, we will configure a CONNECTSERIES 704D to receive audio from a PC running Dante Virtual Soundcard with the Dante Controller application.
Network connection through a router or existing network port.
Cat5 or Cat6 network cable
How to Configure the Connect Series with Dante
Dante Setup: Connect Series Dante Configuration
Connect the amplifier’s Dante port and the network port of your computer to the same network using Cat5 or Cat 6 cable and they will both show up in the Dante Controller software.
For the Dante Transmitter, enter the name of your computer. In this case, it is “LEA-PC”. For the name of the Reciever, enter the name of your amplifier. In this case, it’s “704D”.
Confirm both the Transmitter and Receiver devices are set to the same sample rate, by default the Connect series amplifiers are set to 96k.
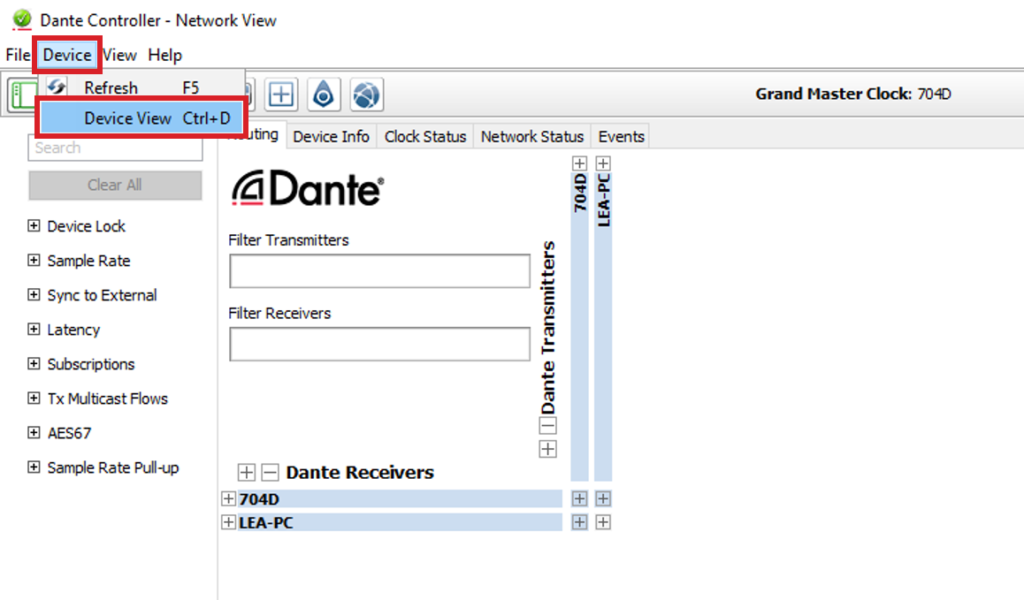
Click on the Device menu at the top and select Device View.
or
Press Ctrl+D on the keyboard.
This will take you into the Device View.
Select the device you want to check in the drop-down menu at the top.
In the new Device View window that popped up click on the “Device Config” Tab.
In this guide we will use 48k so make sure that both devices have their sample rate set to 48k in the “Sample Rate” box.
Close the Device View window and go back to the Network View window.
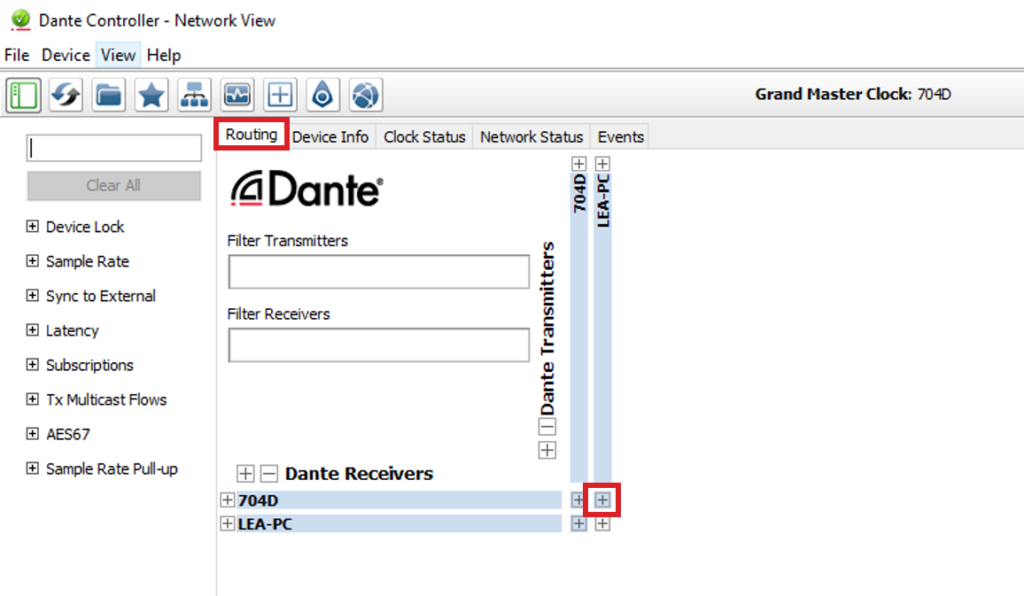
Under the “Routing” tab, click on the “+” sign aligning with the appropriate transmit and receive devices.
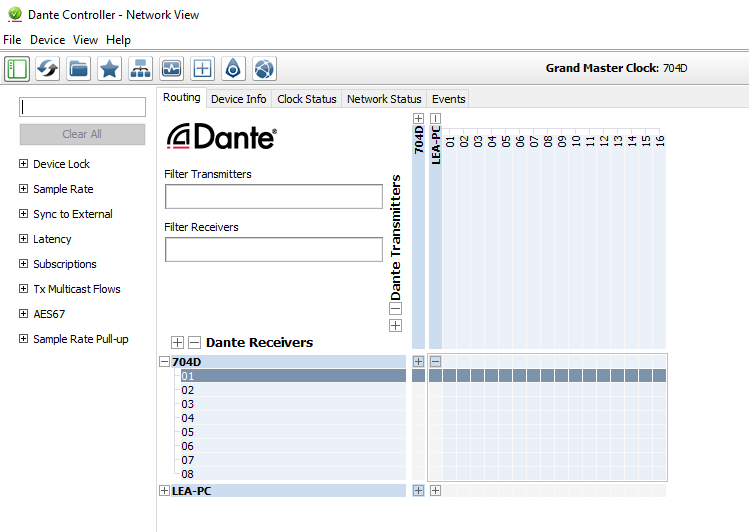
Once expanded, click on the square aligning with Channel 1 of the Transmitter Device and Channel 1 of the Receiver Device. This will initiate the connection and route audio between these devices.
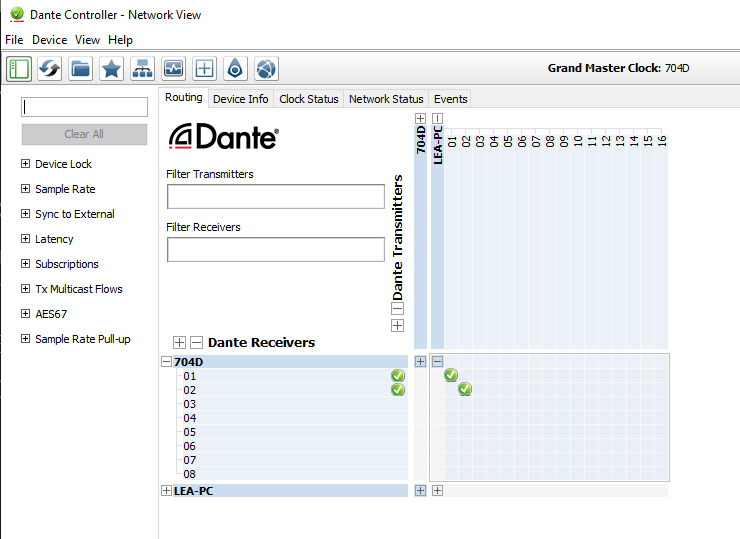
Repeat this step for Channel 2 so that both the Left and Right signals from the computer are routed to the amplifier.
*The Green Circle with Check Mark means the audio is properly routed.
Open the WebUI for the amplifier you have just routed the Dante signals to and go the input section of the DSP.
Click on the Primary Input drop-down menu and select the appropriate Dante inputs.
Assign Dante 1 to Channel 1 on the amplifier and Dante 2 to Channel 2 on the amplifier.
Dante audio has now been successfully routed the output channels of the amplifier!
Dante and the Input Matrix on the Connect Series amplifiers allow for a lot of flexibility in routing sources to a single channel or multiple channels. Assign them however you need for your setup.
If you experience any issues configuring your amp with Dante or have any questions or feedback, please leave a comment below or reach out to us on our social media channels.
Want more LEA content delivered directly to your inbox? Enter your email address below to be subscribed to our monthly newsletter and keep up with all of the latest news and content from LEA Professional.
This website uses cookies to improve your experience. We'll assume you're ok with this, but you can opt-out if you wish.AcceptRejectRead More
Privacy & Cookies Policy
Privacy Overview
This website uses cookies to improve your experience while you navigate through the website. Out of these, the cookies that are categorized as necessary are stored on your browser as they are essential for the working of basic functionalities of the website. We also use third-party cookies that help us analyze and understand how you use this website. These cookies will be stored in your browser only with your consent. You also have the option to opt-out of these cookies. But opting out of some of these cookies may affect your browsing experience.
Necessary cookies are absolutely essential for the website to function properly. This category only includes cookies that ensures basic functionalities and security features of the website. These cookies do not store any personal information.
Any cookies that may not be particularly necessary for the website to function and is used specifically to collect user personal data via analytics, ads, other embedded contents are termed as non-necessary cookies. It is mandatory to procure user consent prior to running these cookies on your website.